


How to Plant Bulbs in Your Lawn Without Damage
Do you want to bring a touch of floral charm to your garden without harming your lawn?
Planting early-flowering bulbs, such as snowdrops, tulips, crocuses and mini daffodils, directly into the grass is a simple way to achieve this. Simply scatter small handfuls of bulbs across the lawn and plant them where they land to create a natural, effortless display, as if they have grown there over time.
These early blooms bring a pop of colour before the main mowing season starts. They also offer valuable nectar for bees early in the year, helping you support the wider ecosystem.
With the right timing, tools, and low-impact planting techniques, you can create your dream garden without compromising the health of your lawn.
The Best Time and Tools for Low-Impact Planting
To make sure that your bulbs flower as soon as possible and don’t interfere with the mowing season, aim to plant them by the end of September. The time in the ground before the frost hits will allow stronger roots to develop and leading to healthier blooms. You should also mow your grass beforehand, as this will make the planting process easier, with shorter grass allowing you to see the soil more clearly.
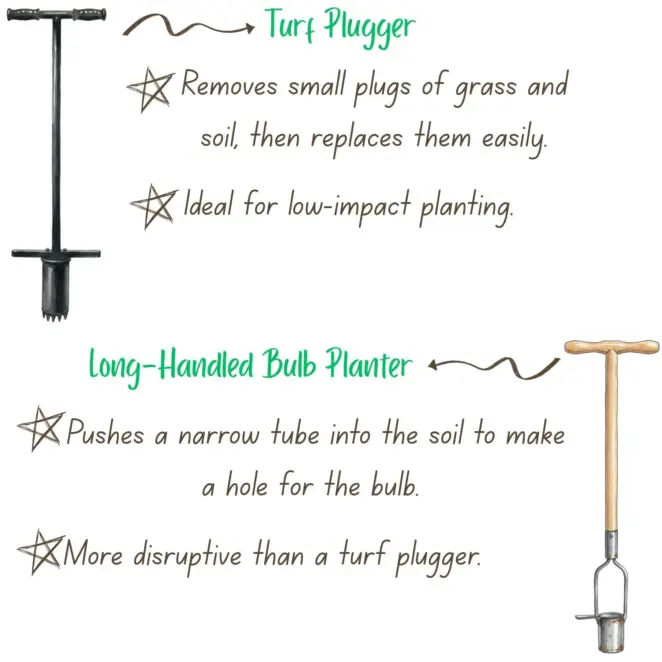
In terms of tools, use a turf plugger or a long-handed bulb planter for minimal grass disturbance.
A turf plugger typically has a metal cup with a handle. It allows you to remove small plugs of grass and soil, which can then be replaced once the bulb is in place, making the process quick and easy while minimising the negative impact on your lawn. As a result, it is often considered the best option for low-impact planting.
A long-handled bulb planter works by pushing a narrow tube into the soil to make a hole for the bulb. The soil can then be pushed back in, but the grass may bend slightly, so it’s a little more disruptive than a turf plugger. However, the disruption is minor, and the lawn can recover quickly, making it the second-best choice.
Step-by-Step: The Zero-Damage Planting Technique
Now that you know the right time and tools, it’s time to plant your bulbs, ensuring your lawn stays healthy and damage is kept to a minimum.
Step 1: The 'Plugging' Method
The plugging method is a technique used to plant bulbs in existing lawns by removing plugs of soil from the ground rather than digging a hole and disturbing the grass.
Start by choosing the right area. According to the RHS, ‘Pick a spot that can be left unmown throughout the early part of the year and that isn’t walked on regularly.’ At the same time, think about the bulbs you want to plant and their sunlight needs. Generally, most bulbs like a sunny spot.
Pick a spot that can be left unmown throughout the early part of the year.

Once you have decided on the location, scatter your bulbs all over the area.
The next step is to grab your tool of choice, place it on the spot where the bulb has landed (making sure to remove the bulb beforehand) and push it into the soil. The hole created should be the depth of three times the bulb’s size. Gardener’s World states that ‘Bulbs that are planted too deeply may produce only foliage at the expense of flowers, or not emerge at all.’
However, this is still a better choice than planting them too shallowly, as this exposes your bulbs to a greater risk of being dug up by wildlife, such as squirrels.
Step 2: Adding Bulbs
Once you have taken the soil plug out and are happy with its depth, it is time to add your bulbs.
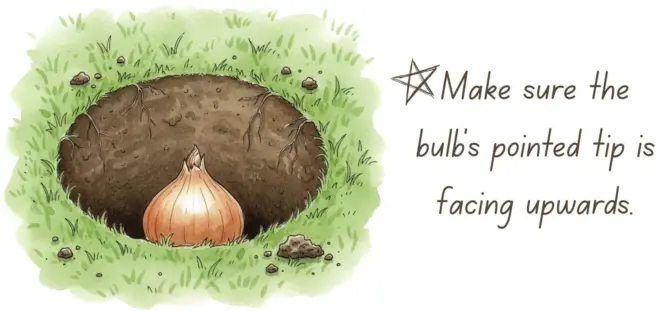
Put one bulb per hole, making sure that the pointed tip is facing upwards. This is where the shoots and leaves will emerge from. If planted the wrong way, the bulb will have to use more energy to reorient itself, leading to weaker, delayed growth, and fewer flowers.
If planting any corms or tubers, make sure to check the packet instructions first.
Step 3: Re-sealing the Plug
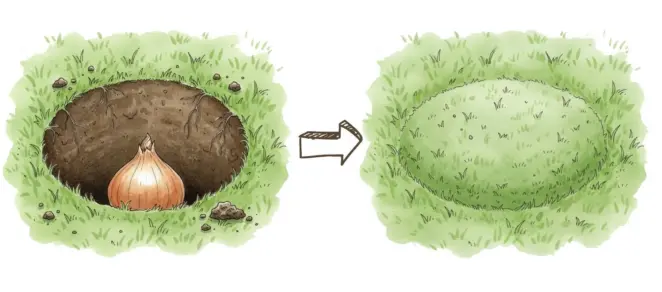
Put the plugs of soil that you previously removed back in their original location so that they fully cover the bulbs. Next, firm them down until they’re level with the surrounding soil. Make sure to be gentle - pushing too hard could damage the bulbs and compact the soil, making it harder for the bulbs to penetrate the ground and grow. Since the soil already tends to be moist in autumn, there is no need to water the bulbs or soil plugs to settle them, as they will receive plenty of moisture over the coming months.
Finally, step back and check the area one final time – make sure the plugs are still level with the grass, leaving your lawn looking as if nothing has been planted at all.
Crucial Aftercare: Keeping Your Grass Healthy
The Essential 'Leaf Rule'
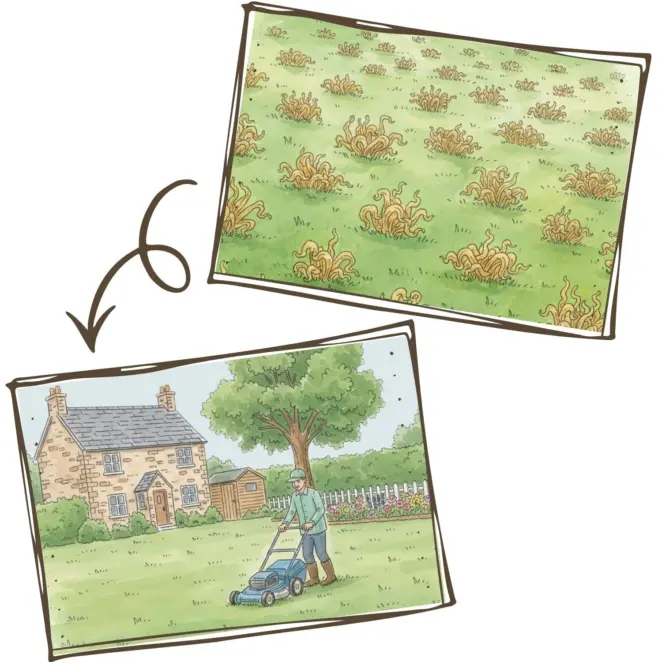
While it is a common misconception that a lawn with bulbs cannot be mowed, it is simply not true. Instead, mowing just needs to be done at the right time to avoid causing any damage. This is where the 'leaf rule' comes in.
To get the timing of the first mow right, observe the leaves closely and only mow the area where the bulbs are once their foliage has died back and turned yellow. Typically, this happens around 6-8 weeks after flowering.
Allowing the foliage to die back naturally allows the bulbs to re-absorb the nutrients and use the energy for next year’s blooms. Without these, they would become weak, likely leading to them not flowering in the future, and dying over time.
The waiting period is likely to result in a delay to the first mow of the season, leading to grass that’s longer than usual by the time it is ready for a cut. Make sure to slowly bring it back to its normal height, even if it takes a few sessions to do so. While it may be tempting to simply cut it all in one go, never remove more than one-third of the grass's length in a single mowing. Doing so removes a large portion of the leaf and stem system that provides energy to the plant. This can stress the grass, making it more vulnerable to heat, drought, diseases, and pests.
Post-Flower Patching
To fill in any gaps that the bulbs may have made, make sure to spend some time patching up your lawn so that it looks its best again.
Start by lightly watering the area and then putting some topsoil on top of it. Not only will this improve the quality of the soil over time as the organic matter breaks down, but also its drainage and drought resistance by improving its structure.

You can then spread some high-quality grass seed over the top. Our Rye Gold Lawn Seed is ideal for this. This carefully balanced mix of perennial ryegrass and two varieties of red fescue stays green all year round and starts growing at just 7°C, so you can plant it even in the unpredictable British weather. On top of this, it can handle heavy foot traffic, making it a perfect choice for families with kids and pets. To learn more about this blend, check out our ‘Grass Seed: Why Choose Our New Product?’ blog.
After sowing, water your grass seed regularly if the weather's dry to keep the soil consistently moist until the new grass germinates. In warm weather, you can usually expect to see it start growing in just 1-2 weeks, with another 6-8 weeks before the grass is fully established.
Alternatively, if you prefer an instant finish or the gaps are slightly larger, you can lift the affected patches and replace them with fresh, high-quality turf. This gives immediate coverage and restores the lawn’s appearance straight away. Take a look at our ‘How to Lay Turf’ guide to learn how to do this.
With the right timing, tools, and technique, you too can plant beautiful bulbs and transform your lawn into your own colourful haven while keeping the impact on your grass to a minimum.
Once the bulbs have died back, it’s important to spend some time on lawn maintenance. You'll likely have a very thick lawn, so avoid cutting more than one third of the grass height in a single mow. This can stress the grass and make it more vulnerable to heat, drought, pests, and disease. You can also lightly top dress the area with topsoil and scatter some grass seed to help your lawn recover over time. If you prefer an instant finish, laying fresh turf over the affected spots will restore your lawn’s appearance immediately.
For everything you need to keep your lawn looking its best - from high-quality turf to grass seed and topsoil - take a look at our range of products today!
FAQs
Does planting bulbs in the lawn damage the grass?
If done correctly, planting bulbs causes minimal damage. With a little aftercare after the foliage has died back, your lawn should recover quickly.
When should I mow after bulbs have finished flowering?
Only mow once the bulbs’ foliage has fully died back, usually around 6–8 weeks after flowering.
How can I plant daffodils in lawn without damage?
Plant daffodils by the end of September and use low-impact tools, like a turf plugger. This helps the bulbs flower early in spring while keeping your lawn healthy.
What are the best lawn bulbs to plant?
This depends on your personal preferences, but popular options include crocuses, mini daffodils, Siberian squill, and grape hyacinths.
